Forwarding an email is a useful feature for many types of use cases. Whether it is a old unused email or a temporary measure, it can help send emails to the correct destination. Once mail forwarding is turned on, it will send a copy of all the emails that account receives to the forwarding address. To only forward email that meets a certain criteria, follow the guide on how to create a filter in Gmail.
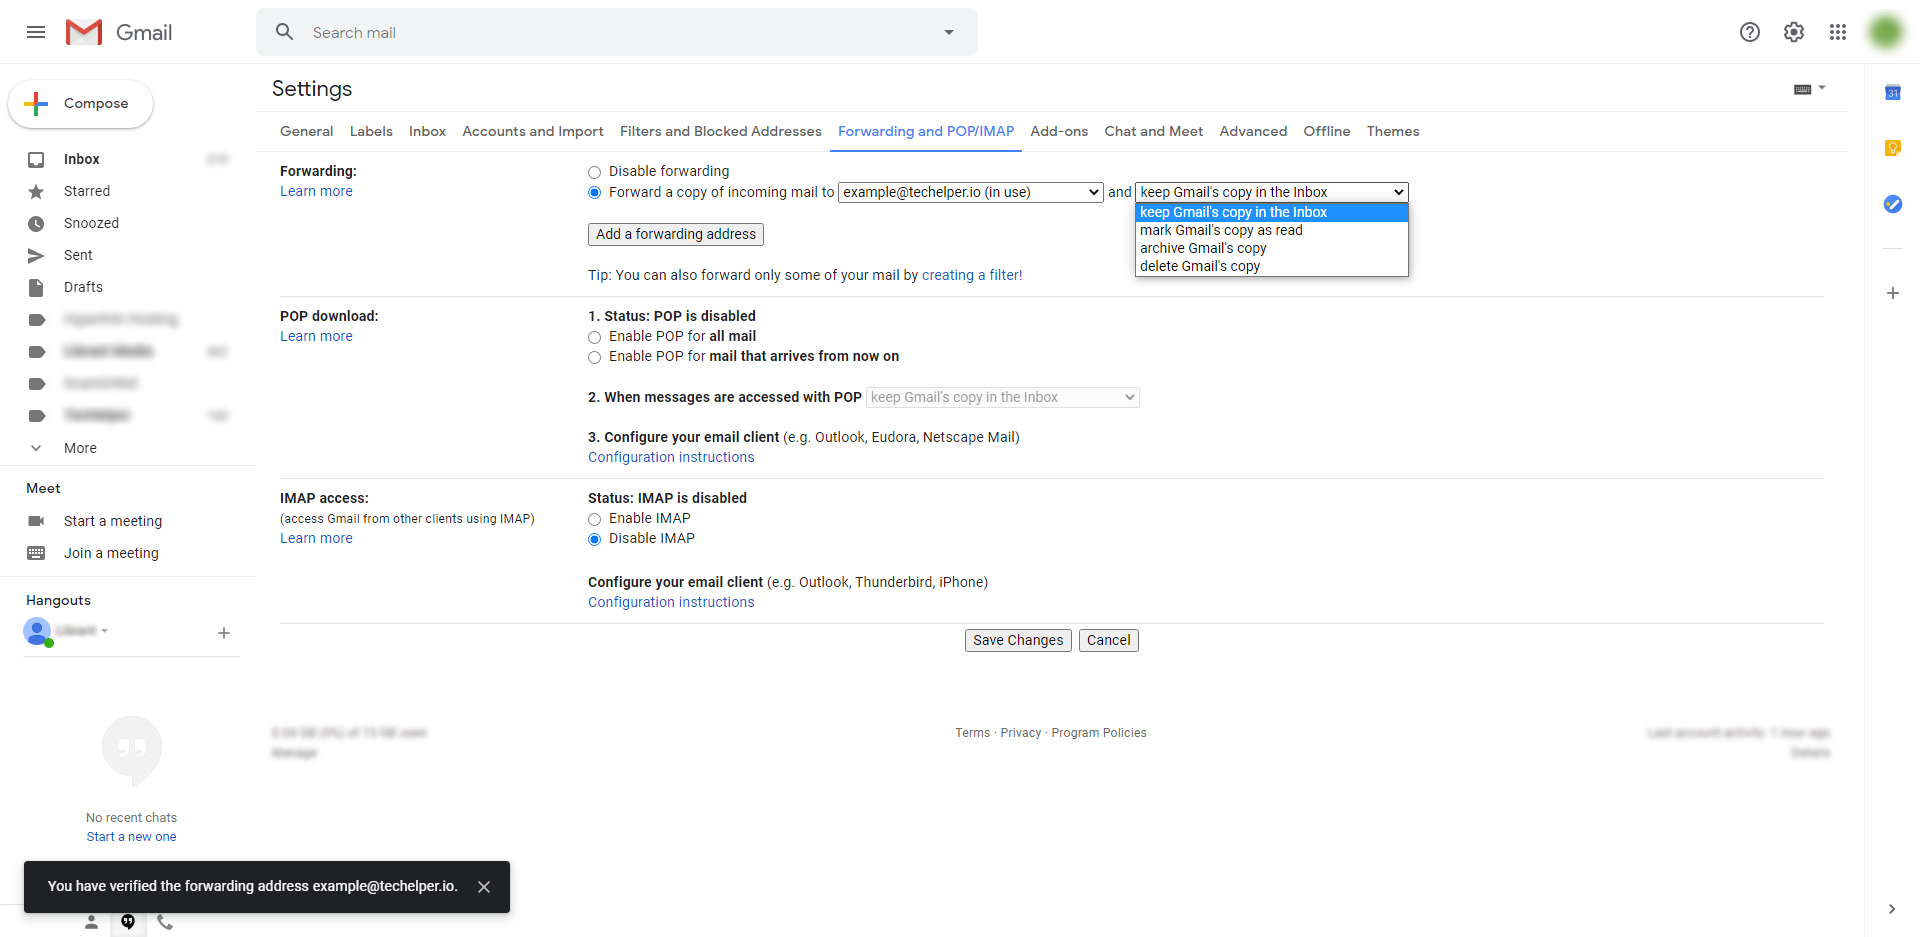
The option to delete the original, mark it as read or archive it can be found at the very end of this guide on step 8.
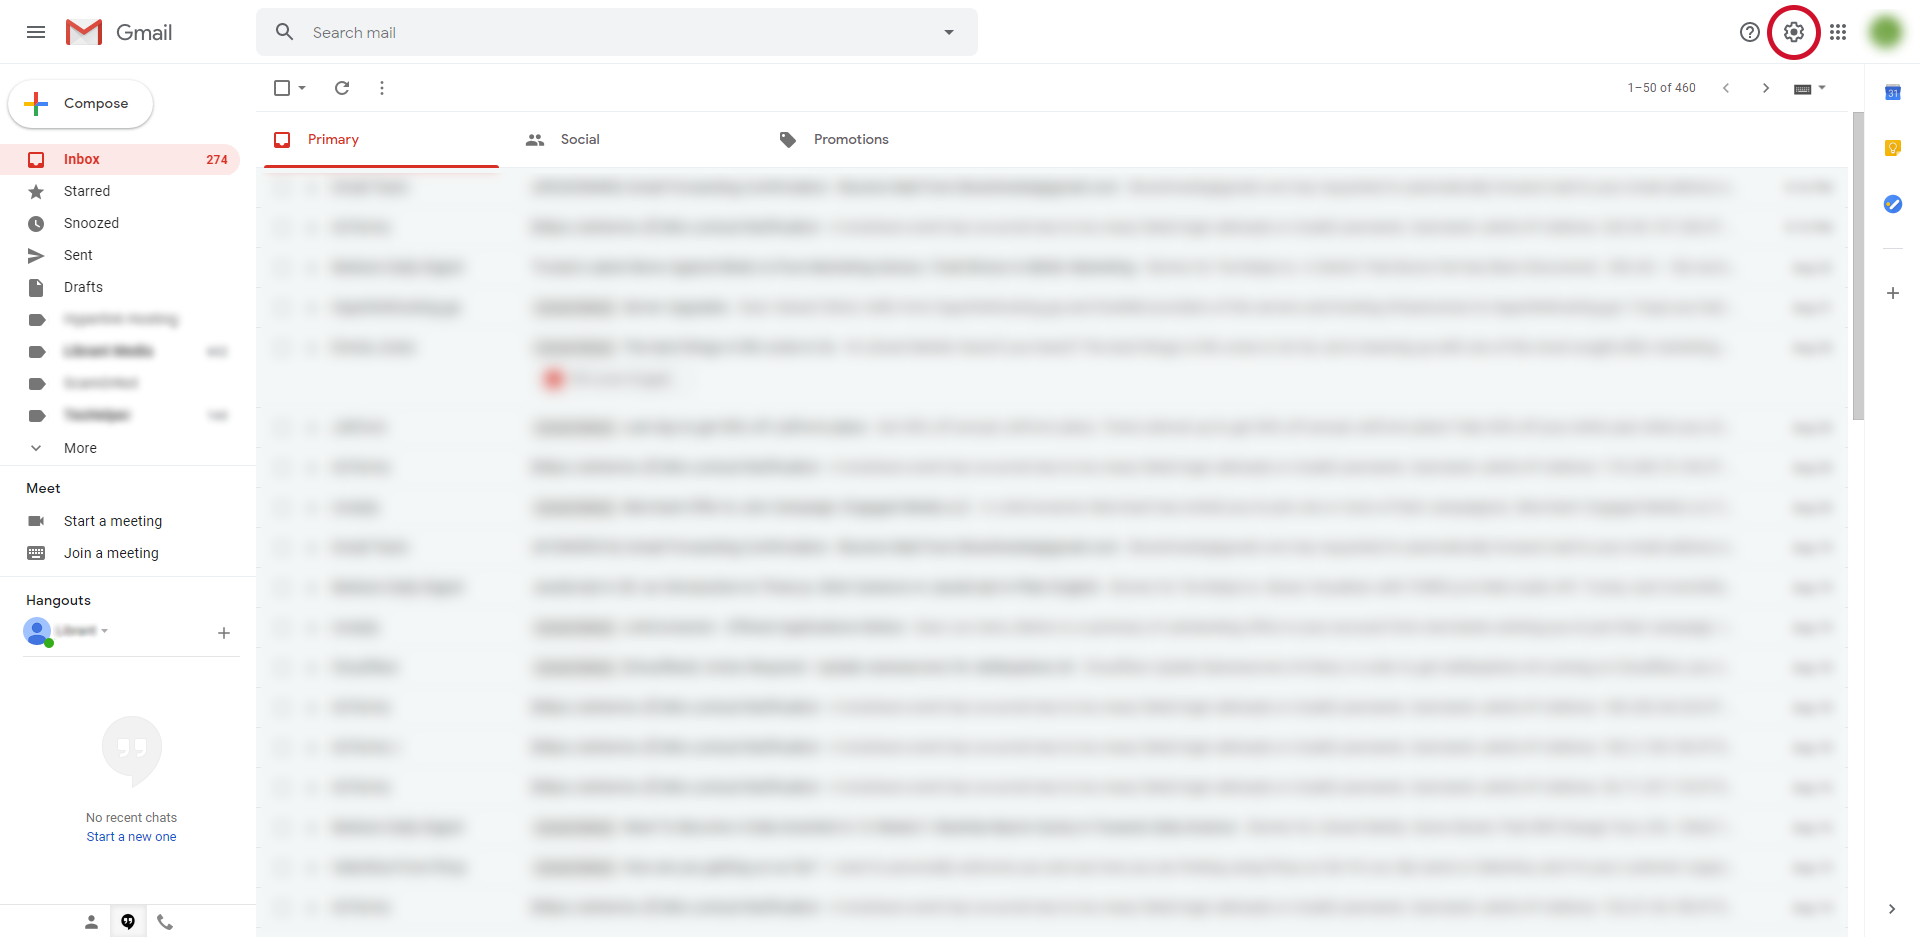
- Open Gmail and click on the Settings/Gear icon in the upper right corner.
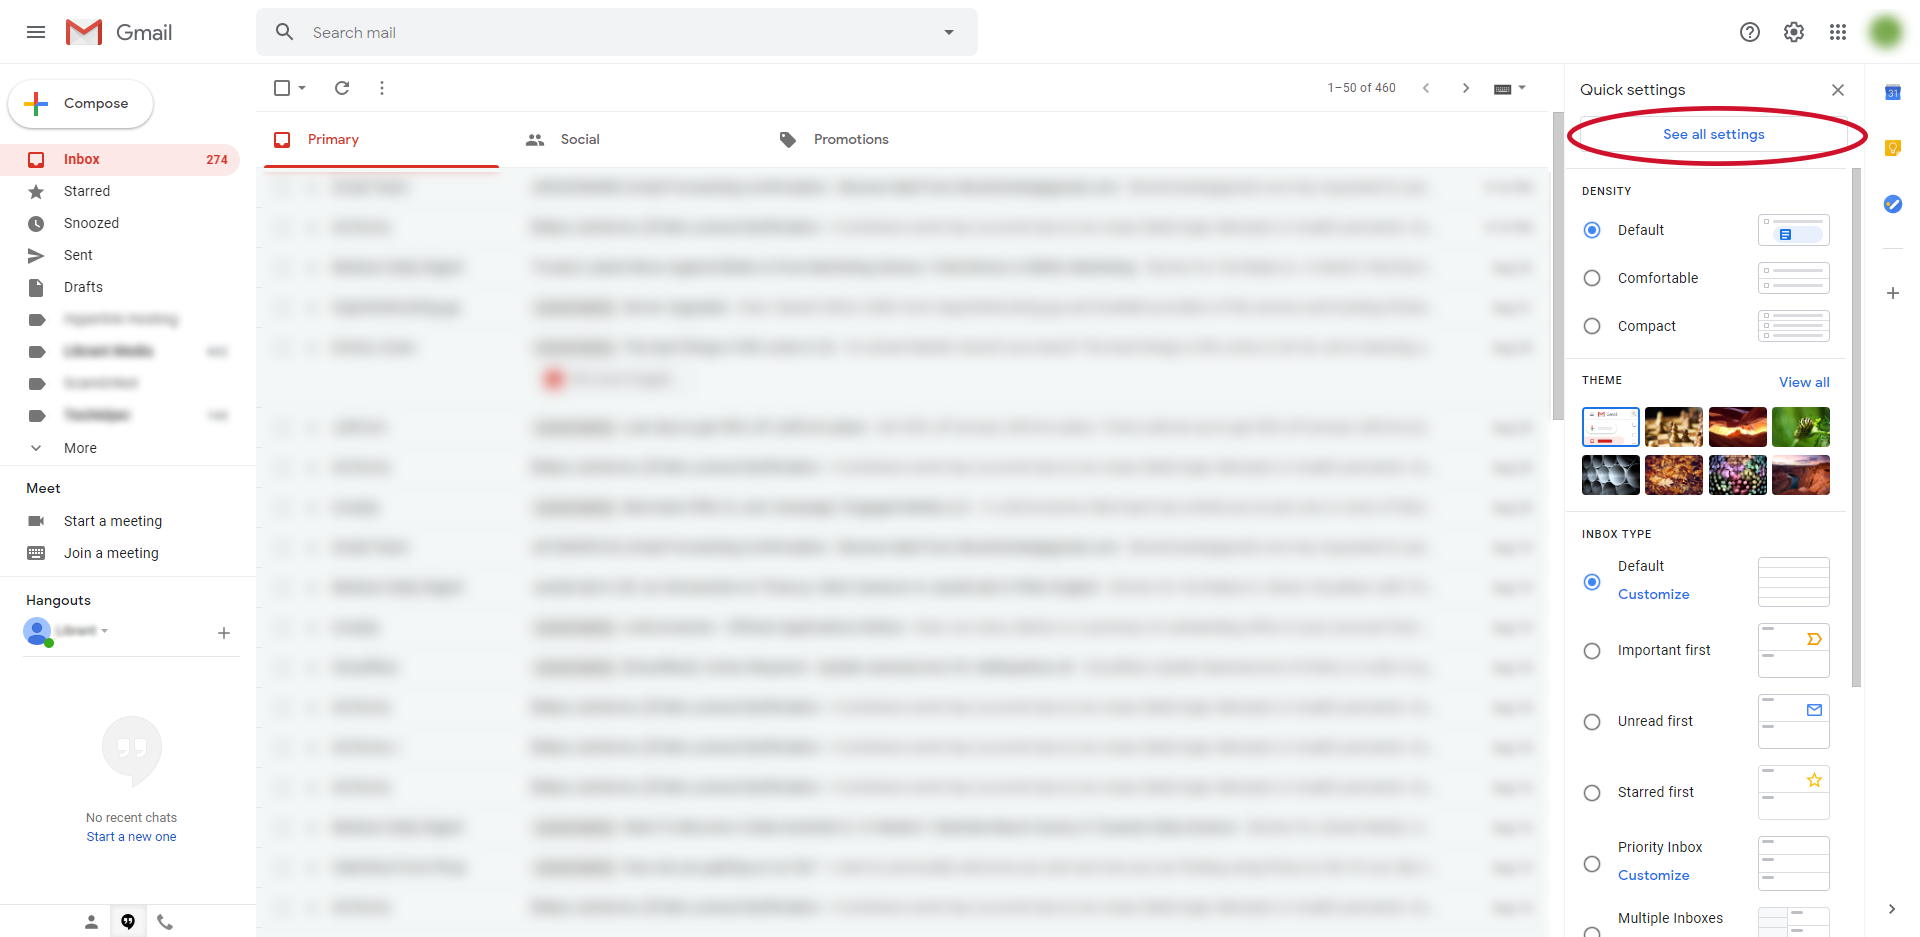
- In the Quick Settings menu, click on the “See all settings” button.
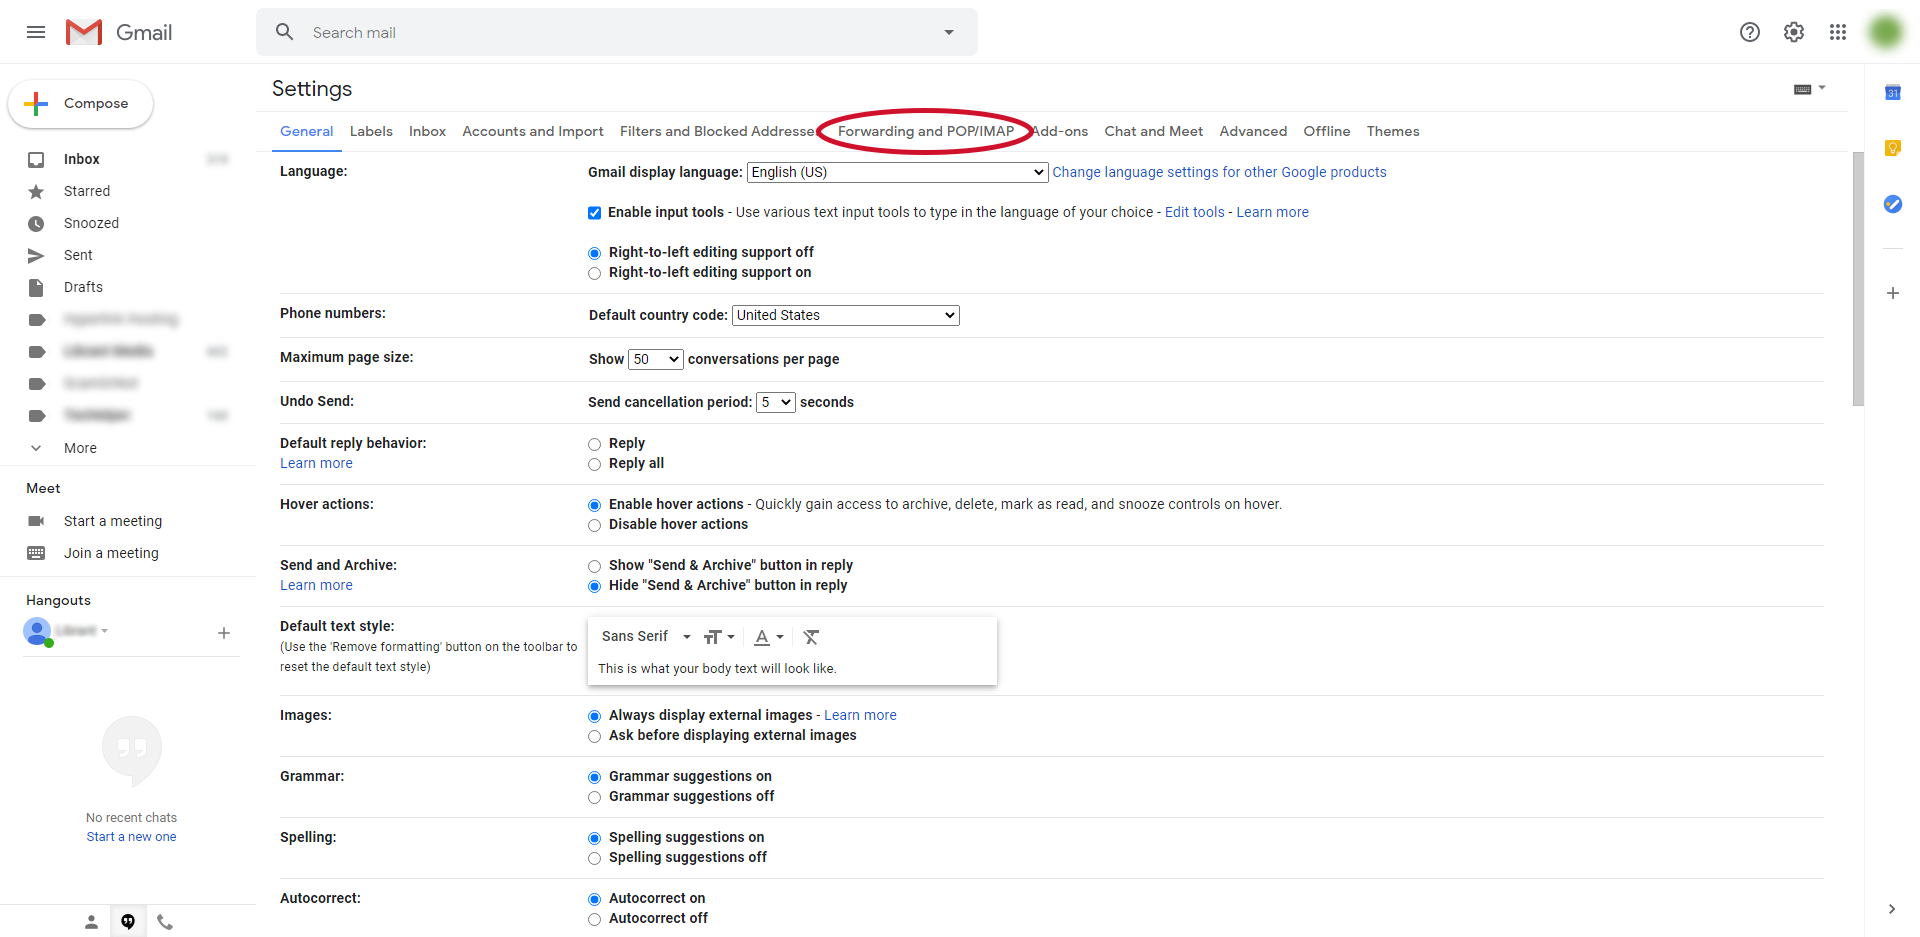
- On the Settings menu, click on the “Forwarding and POP/IMAP” tab.
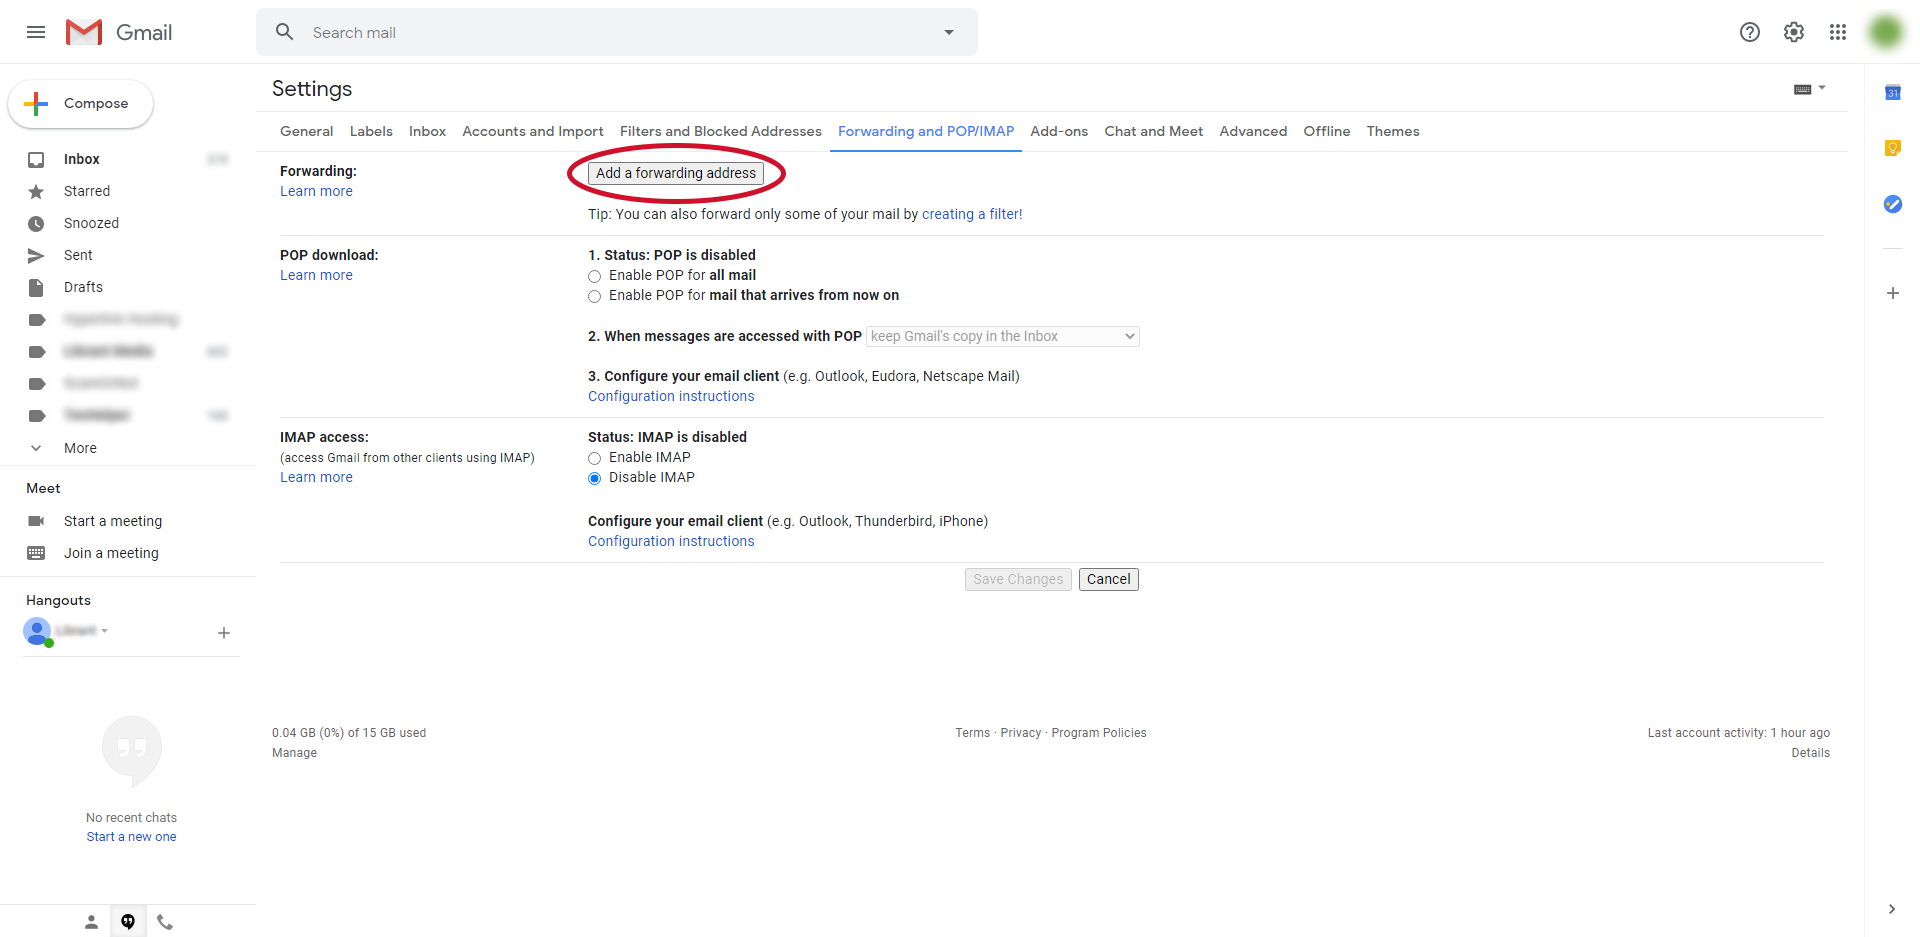
- In the Forwarding and POP/IMAP tab, inside the Forwarding section, click on the “Add a forwarding address” button.
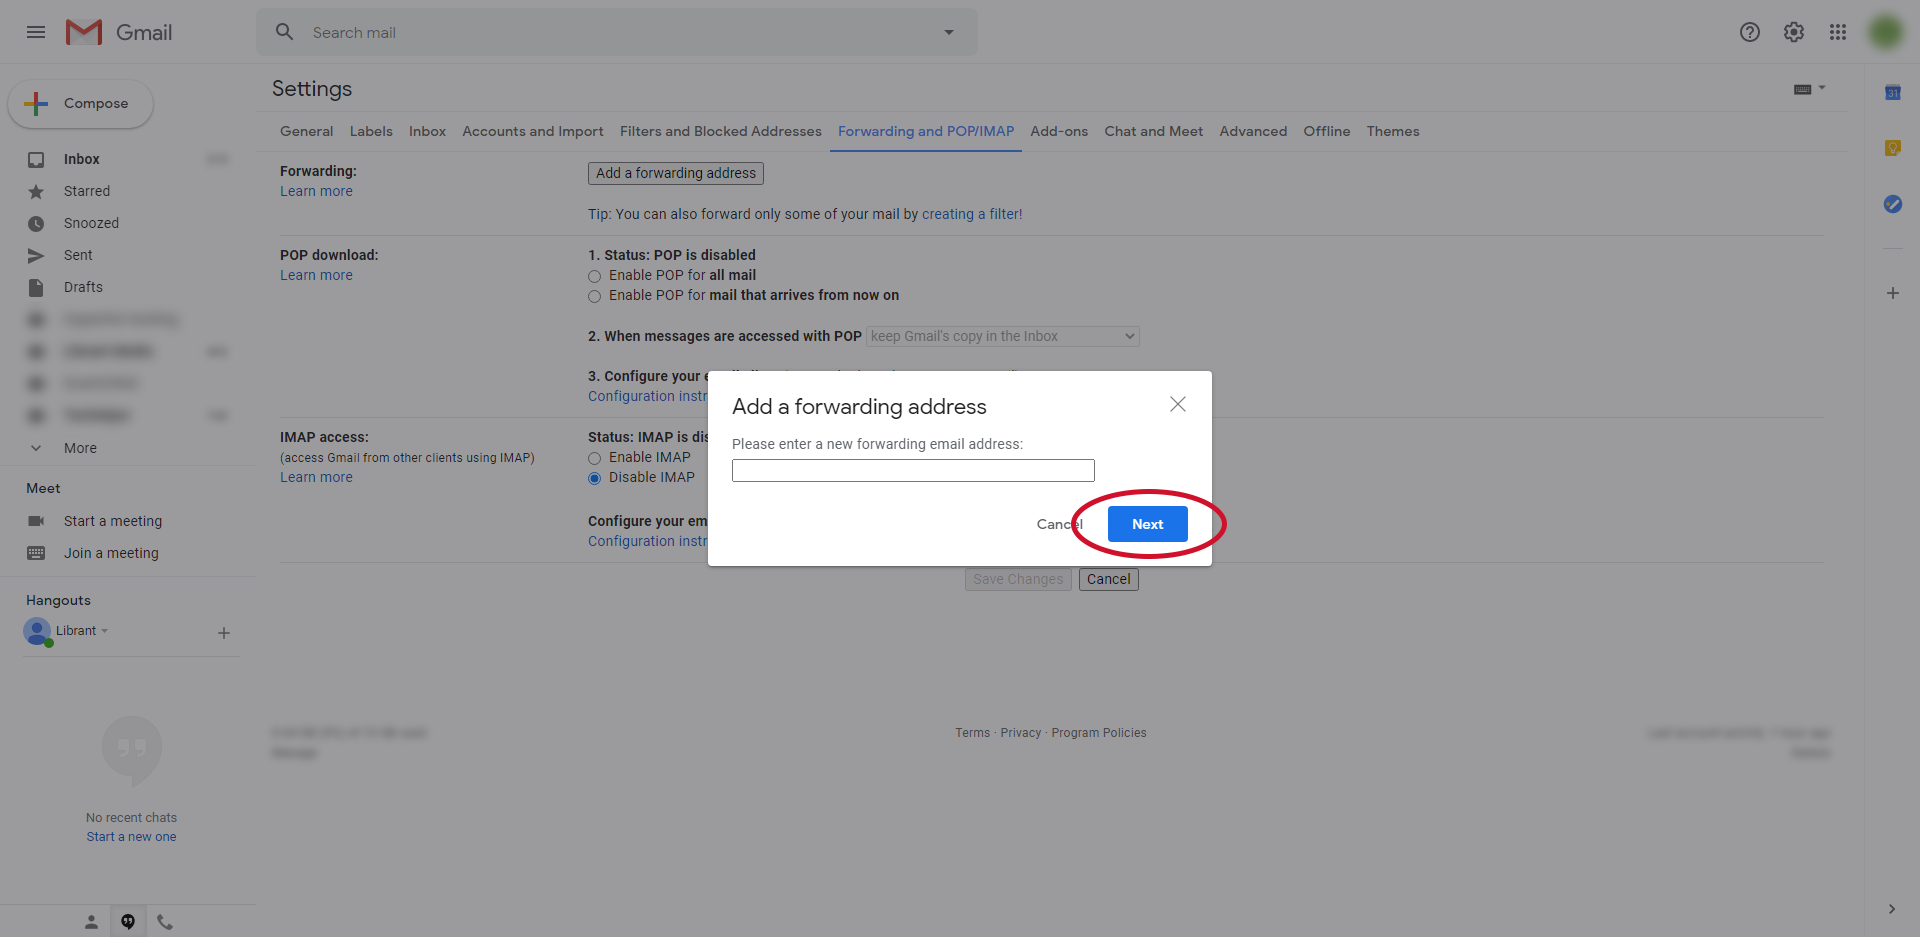
- Enter the email address for where you want to forward emails to.
- Click on the “Proceed” button when a pop-up appears to confirm.

- Open the email in on the destination email address of the forwarding and either click on the link or copy the verification code to confirm.

- Method A: Clicking the Verification Link
- Click on the “Confirm” button.

- Now, the email forwarding should be turned on.

- Click on the “Confirm” button.
- Method B: Verification Code
- Copy and paste the verification code into the text box back in the Forwarding section of the Gmail settings and click the “Verify” button.
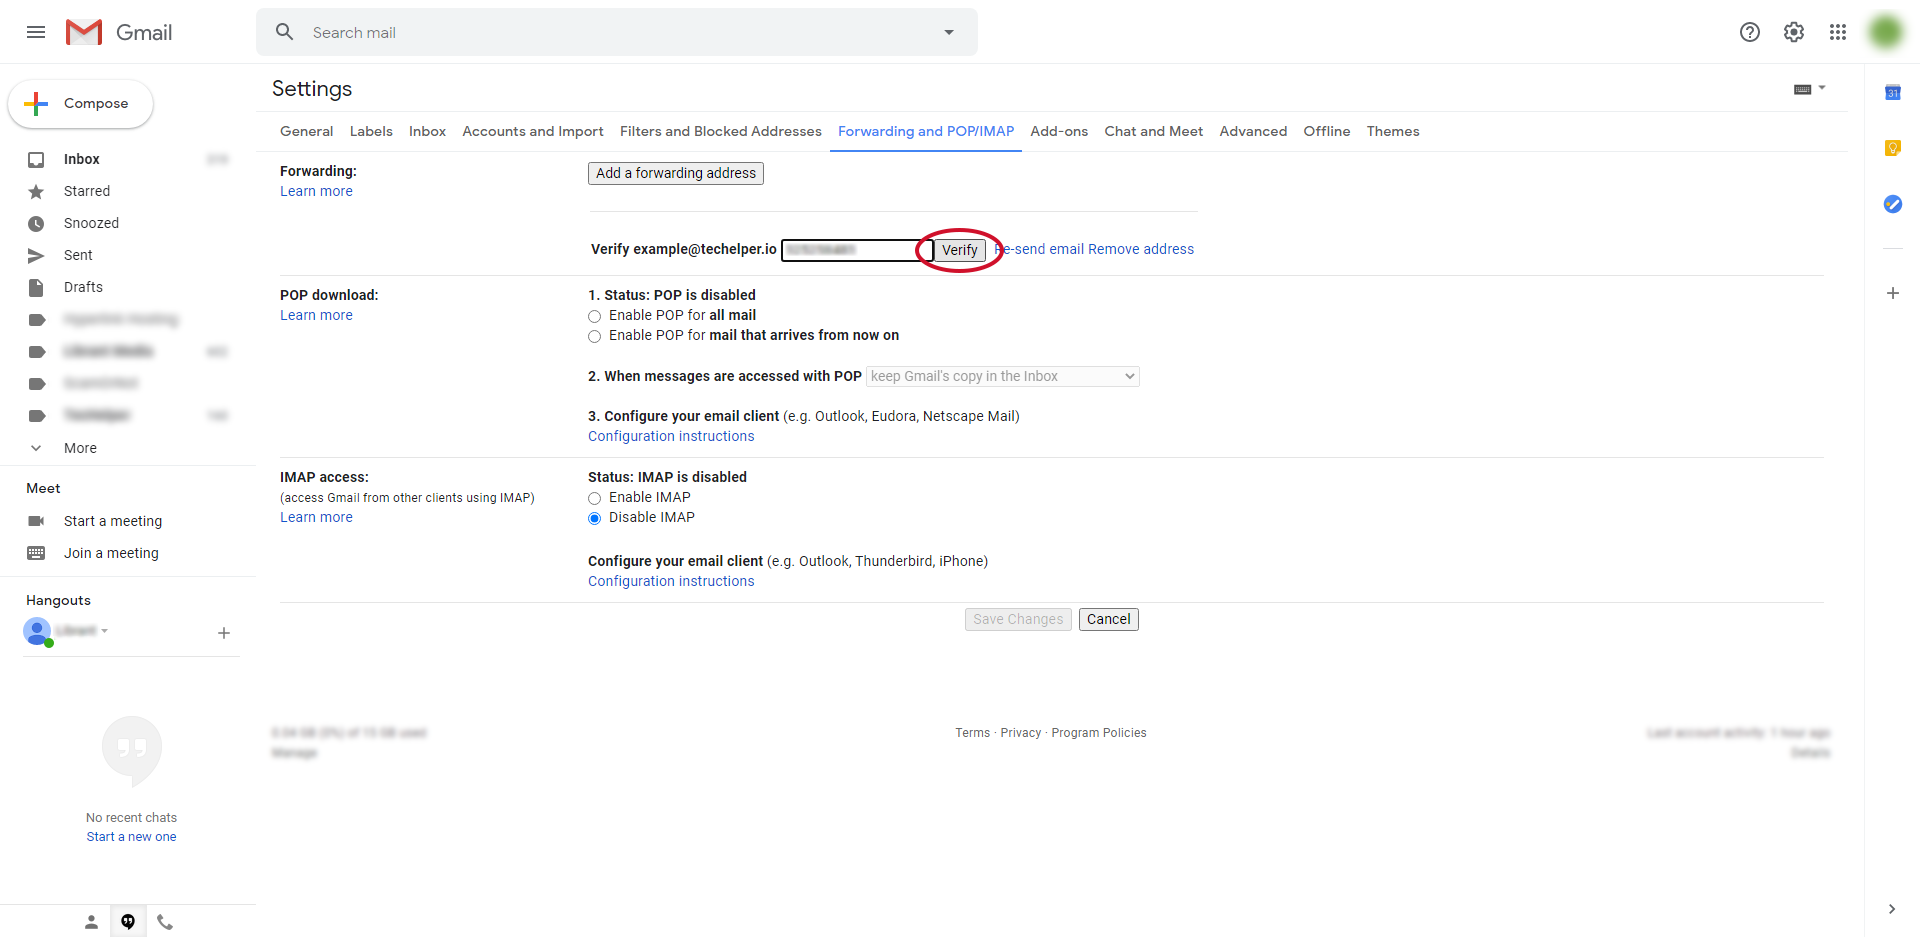
- Now, the email forwarding should be turned on
- Copy and paste the verification code into the text box back in the Forwarding section of the Gmail settings and click the “Verify” button.
- Method A: Clicking the Verification Link
- Modify the forwarding email address and preferences and click “Save Changes” at the bottom of the page.
