Alias email addresses are useful for side jobs or work emails which can be sent with a existing Gmail account without creating a completely separate account.
It is important to note the difference between “not a alias” (as Google refers to them as) or alternate email addresses, and aliases. Alias emails are able to send emails, just like alternate emails, but alias emails can also receive emails.
Emails received at the alternate email address still get sent to whatever mail server the email address is located at, but the emails won’t show in this inbox.
This guide covers how to add a alias email address, but click here to learn how to add alternate email addresses in Gmail.
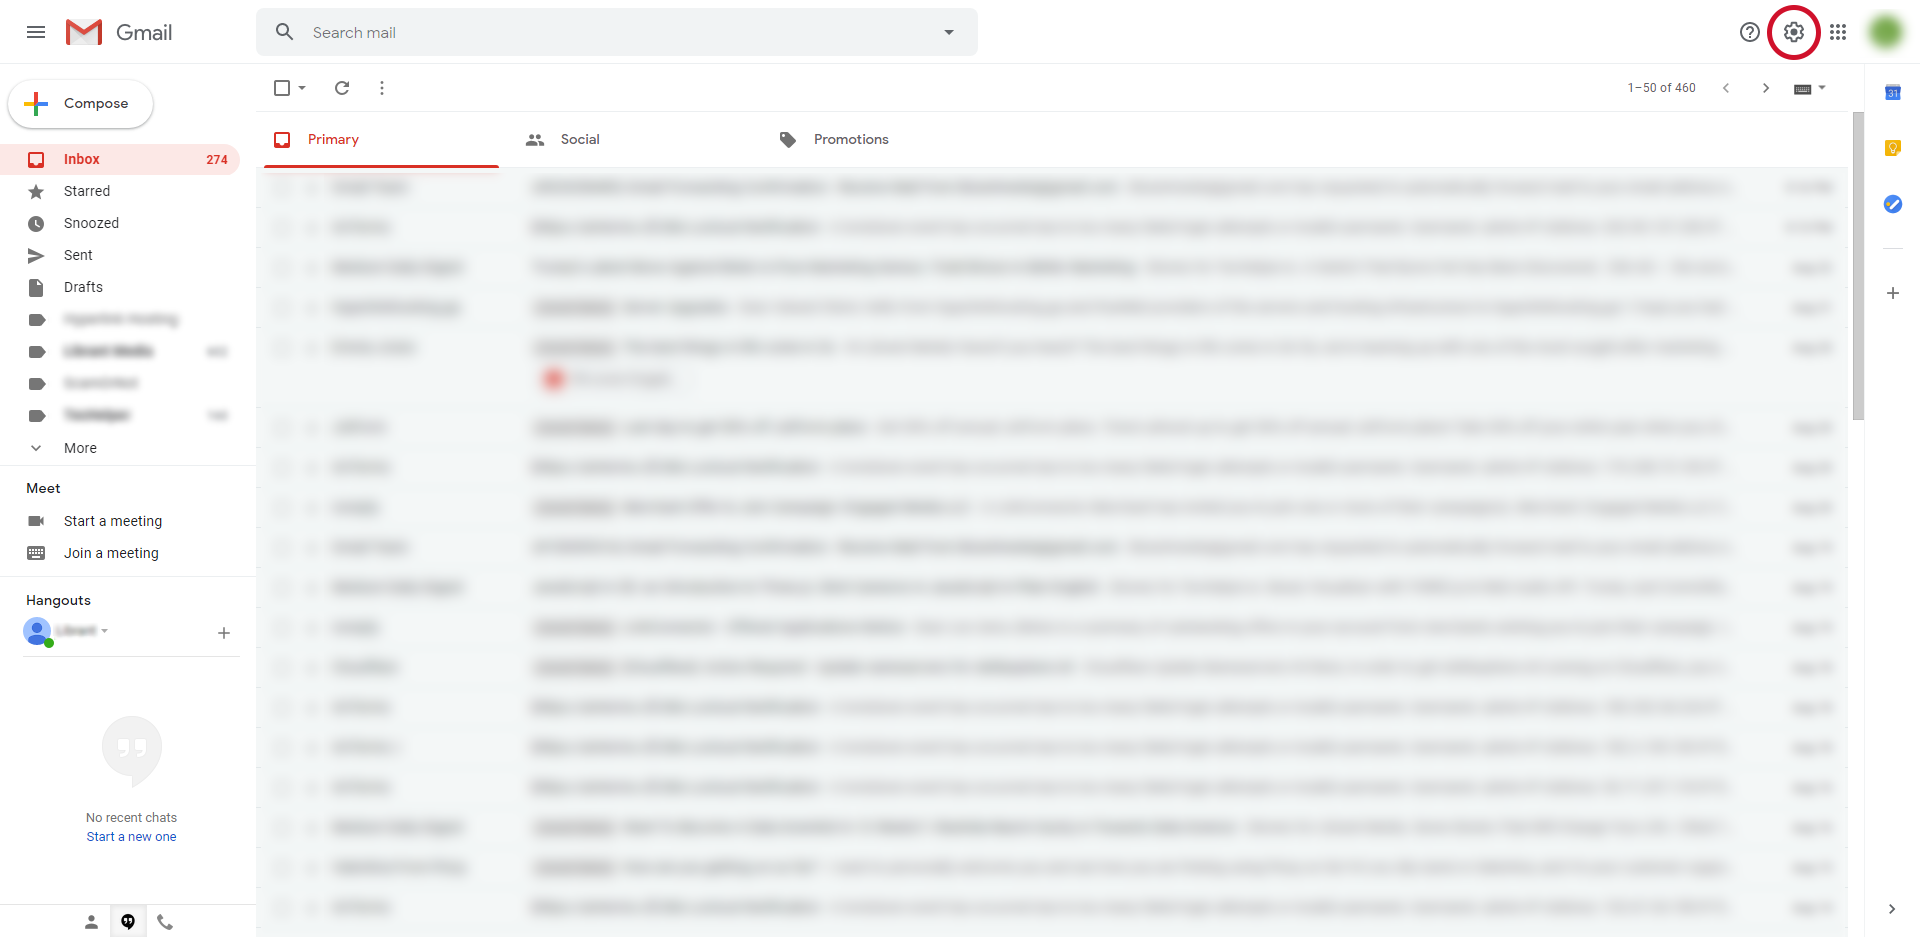
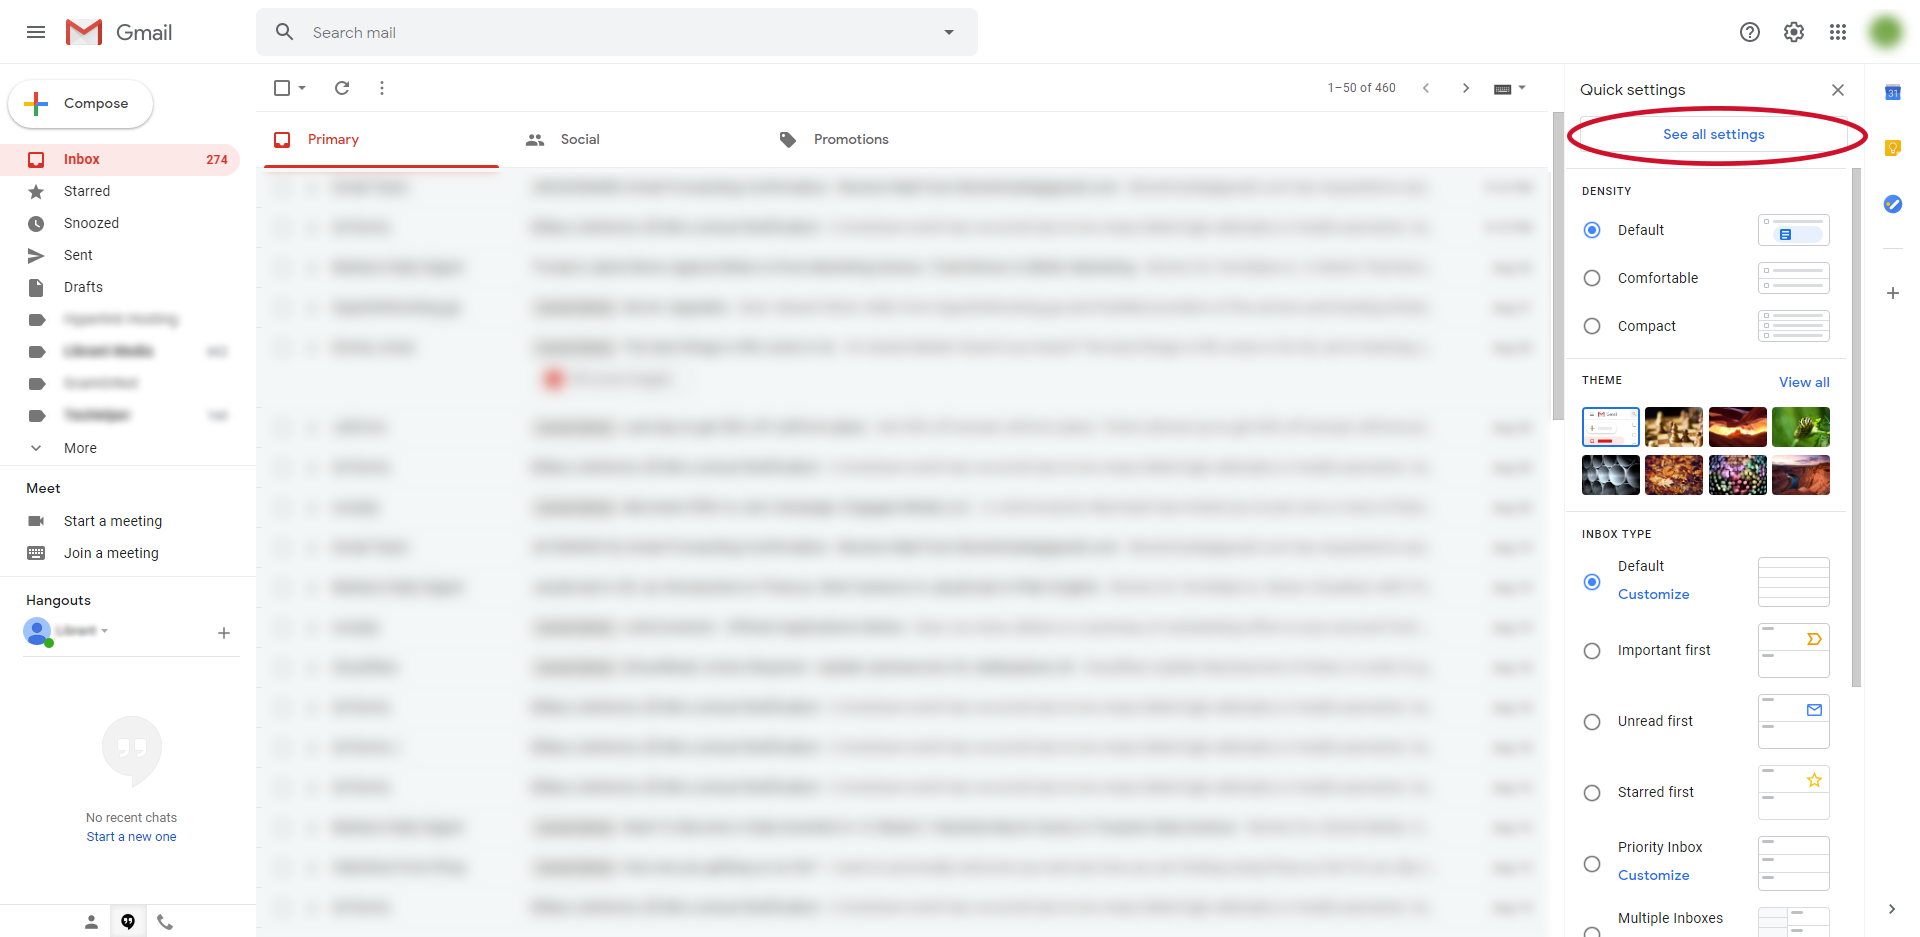
- Open Gmail and click on the gear icon in the upper right corner.
- In Quick Settings, click on the “See all settings” button.
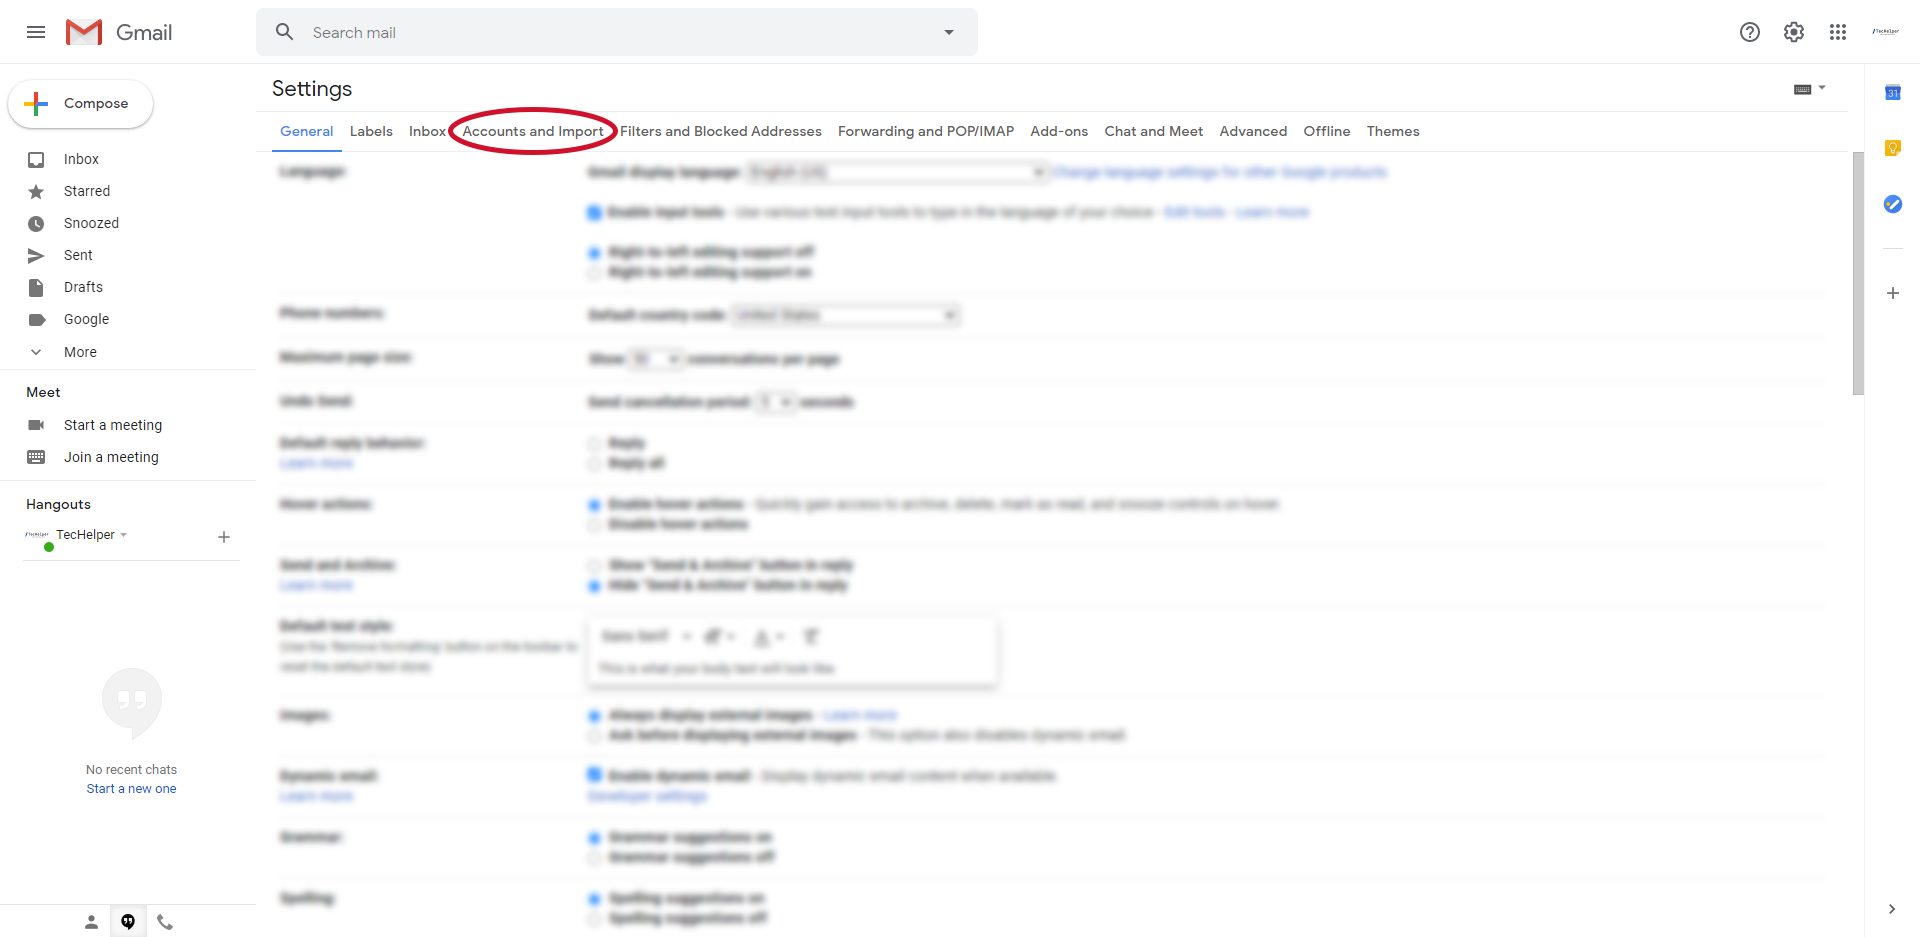
- In Settings, click on the Accounts and Import tab.
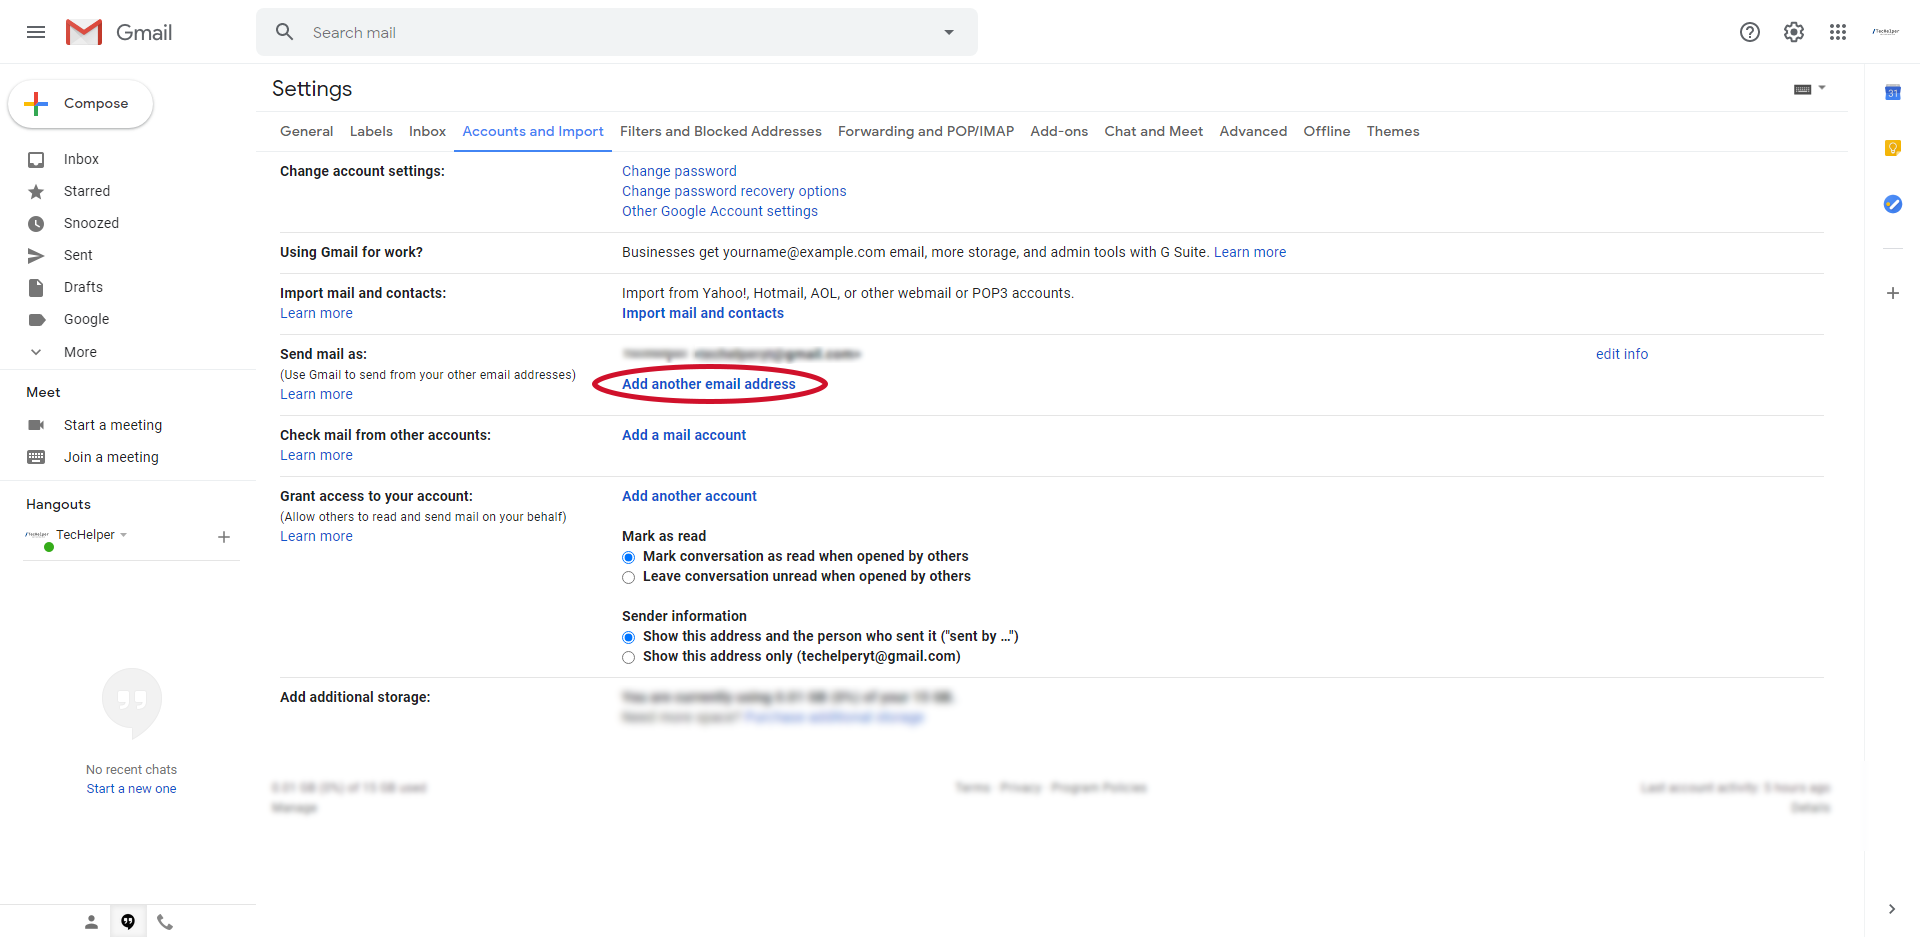
- Under the Send mail as section, click on the “Add another email address” button.
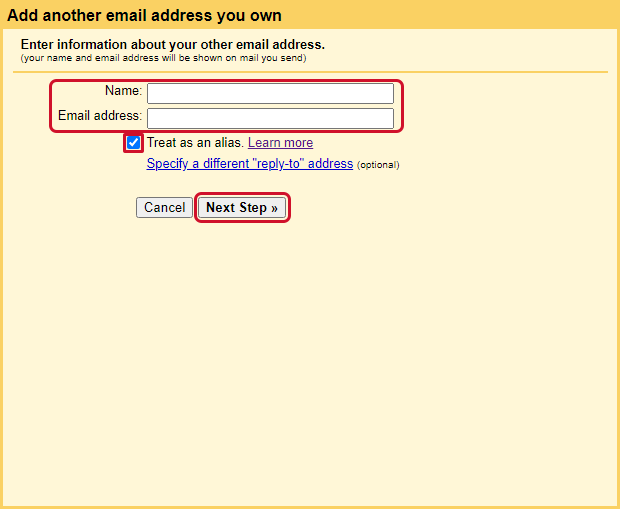
- Enter the email address as well as the name (which is what will appear as the name when sending emails) and click “Next Step”. Make sure that the checkbox next to “Treat as an alias” is selected, as shown.
- It will prompt to confirm the email address. Click “Send Verification”.
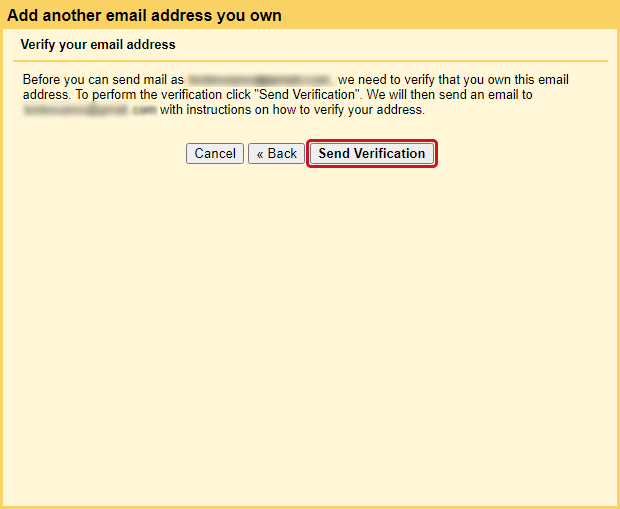
- A verification email has been sent to the alternate email address.
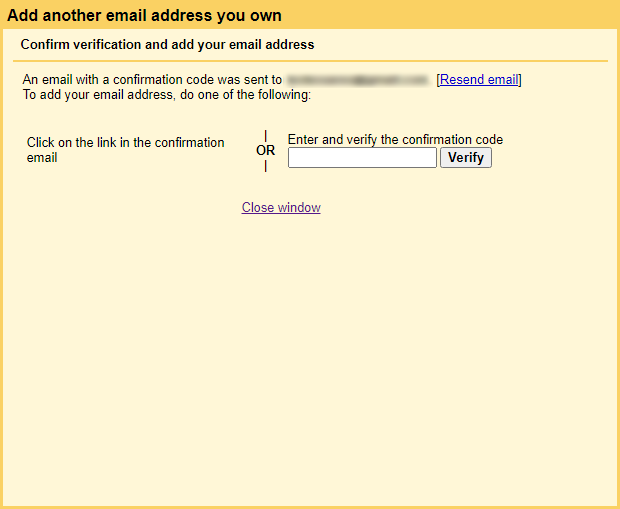
- There are two ways to confirm. Refer to the instructions that follow.
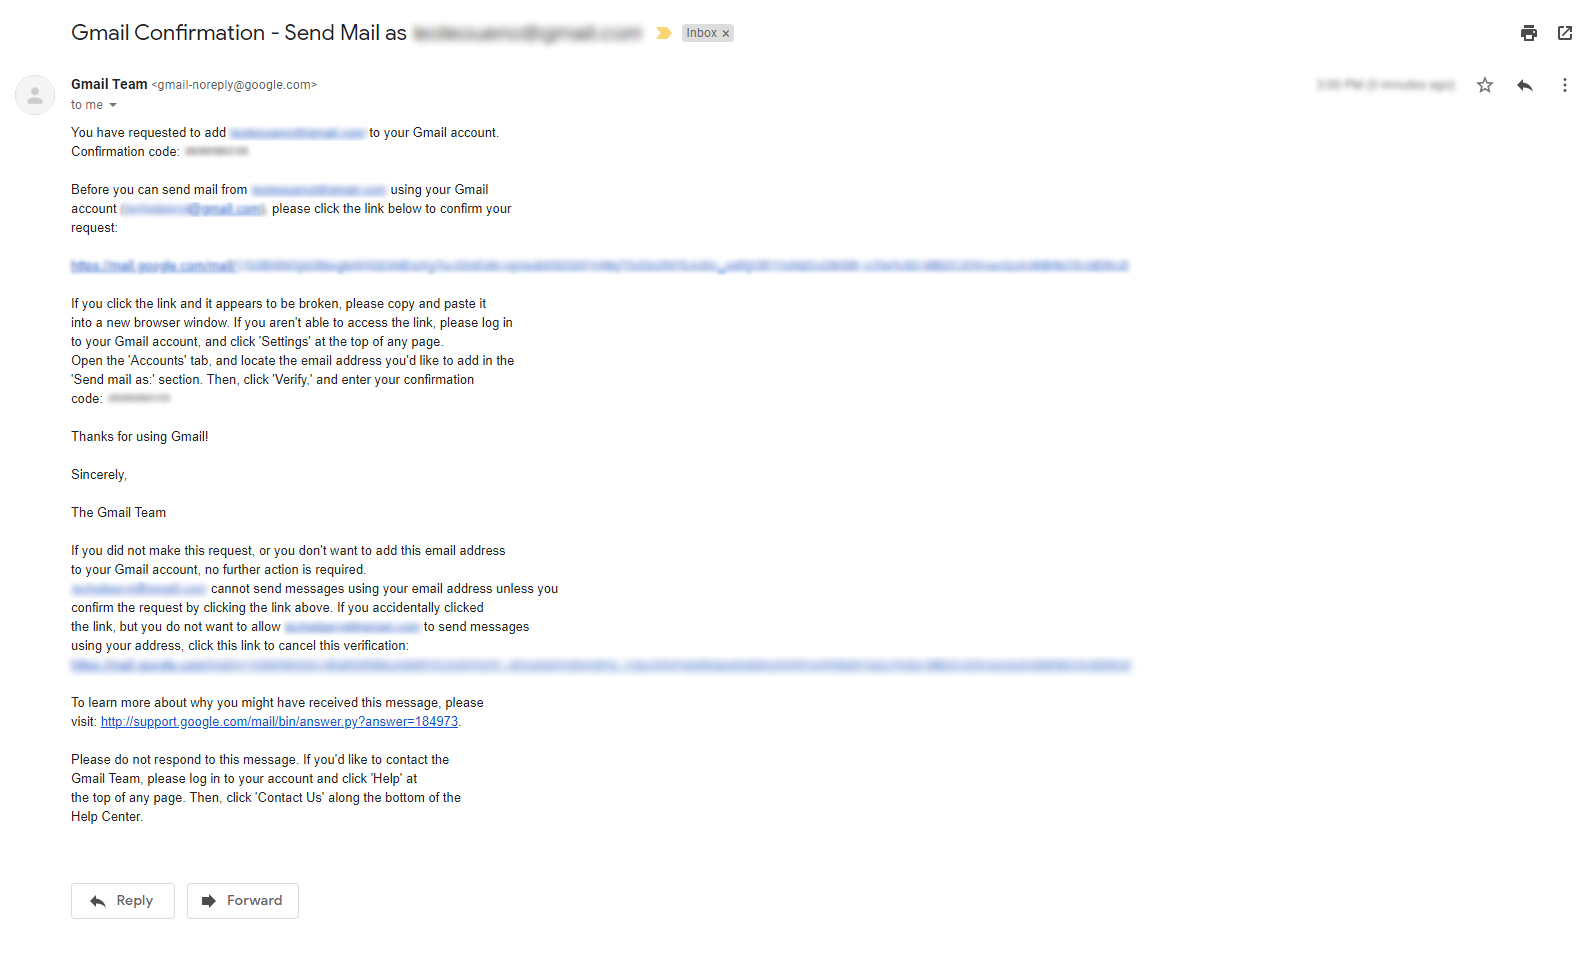
- Verification Link
- Click on the link listed under “please click the link below to confirm your request”.
- Confirmation Code
- Copy or note the confirmation code.
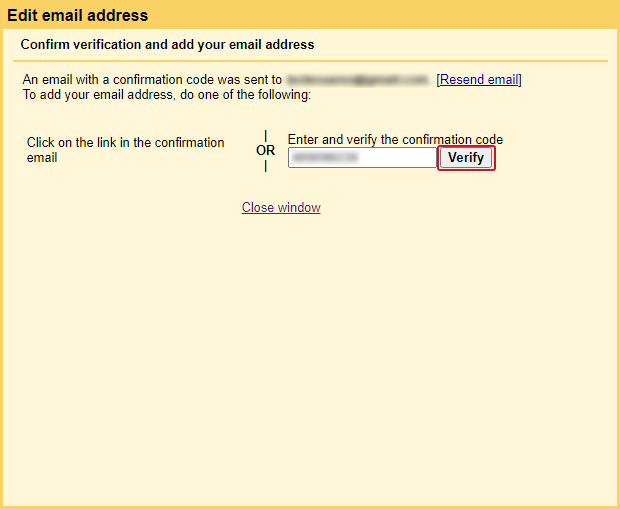
- Go back to the popup that appeared and enter the code. Click “Verify” once done.
- Verification Link
- The alias email address should have been added.

